*FYI - this post may affiliate links, which means we earn a commission (at no extra cost to you) if you purchase from them. Also, as an Amazon Associate I earn from qualifying purchases. For the full scoop on what this means, feel free to check out our Privacy Policy and Disclosure.
If you’ve been wondering how to create one of those super aesthetic home screens that have been going viral lately, then this guide is here to help!
One of the most popular apps for customizing one’s iOS14 home screen is Widgetsmith. In this article, we’ll show you step by step (with screenshots) how to use Widgetsmith to add gorgeous widgets that you can customize to match your ideal aesthetic, like Harry Potter, for instance.
We hope you find it helpful.
Step by Step How to Use Widgetsmith to Create a Photo Widget
To use Widgetsmith, you basically create widgets within the app, then add them to your home screen one at a time, dragging them to the correct spot.
So, let’s get started.
For the purpose of this tutorial, we’ll be showing you how to make a generic photo widget that features the visual of your choice.
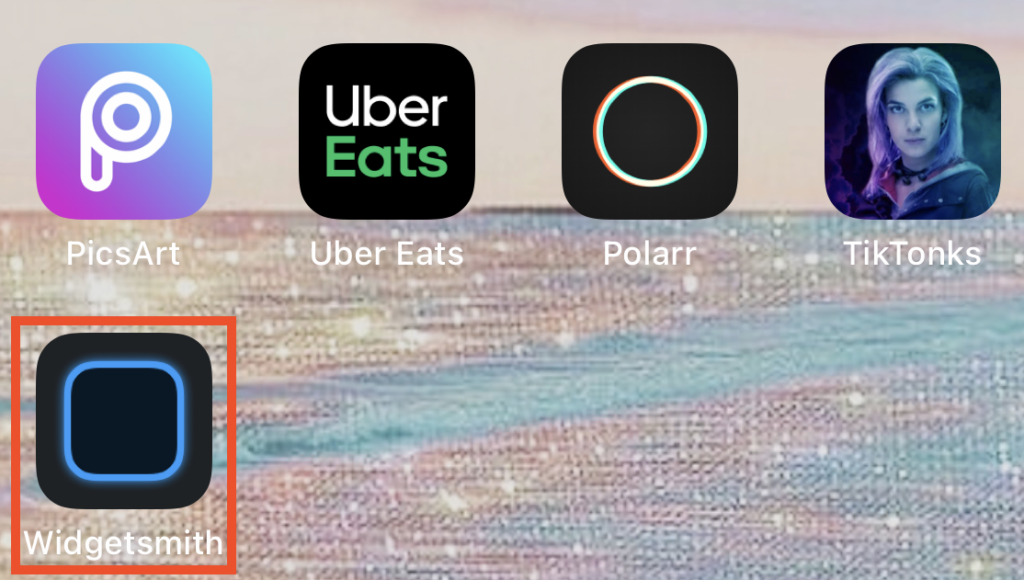
First things first: Download Widgetsmith in the App Store and open the app.
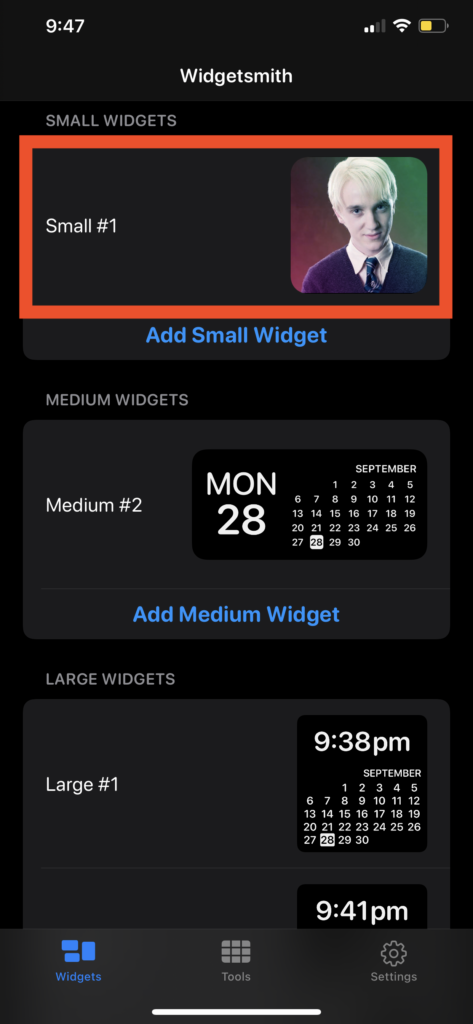
Once the app opens, you’ll be presented with a screen full of widgets that are divided into the following categories: small widgets, medium widgets,, and large widgets.
There are calendars by default, but there are lots of different options for widgets (as you’ll see later).
Go to the size widget you want to add a photo or text to and hit “Add ___ Widget.”
We’re starting with the “Small” widget, so we will press “Add Small Widget.”
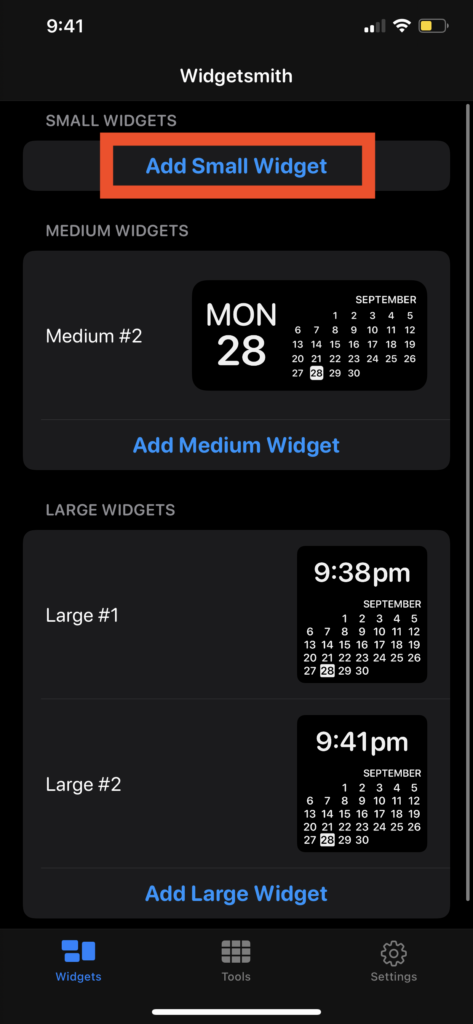
A new widget will then be added to that size category.
To edit this widget, click ON the widget itself (for example, we click on Small #1) and you’ll then see this next screen.
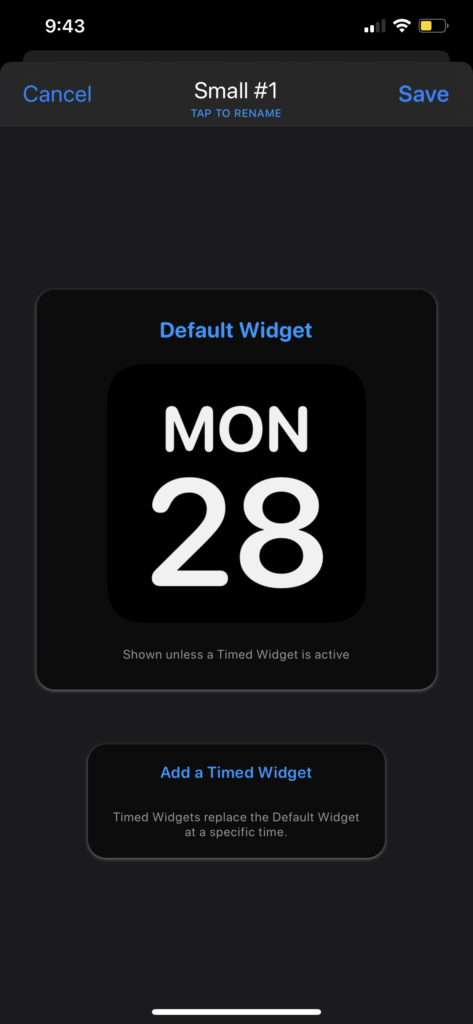
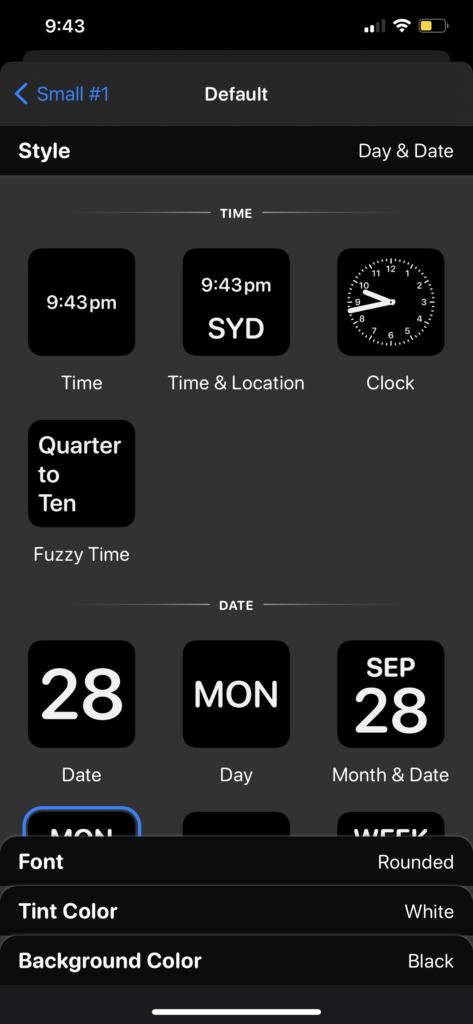
From here, you need to Click ON the widget again, and your screen will show all the different widget styles at your disposal, from Time, Date, Custom, Calendar, Reminders, Health & Activity, Astronomy, and Premium options if you pay extra, like Weather and Tides.
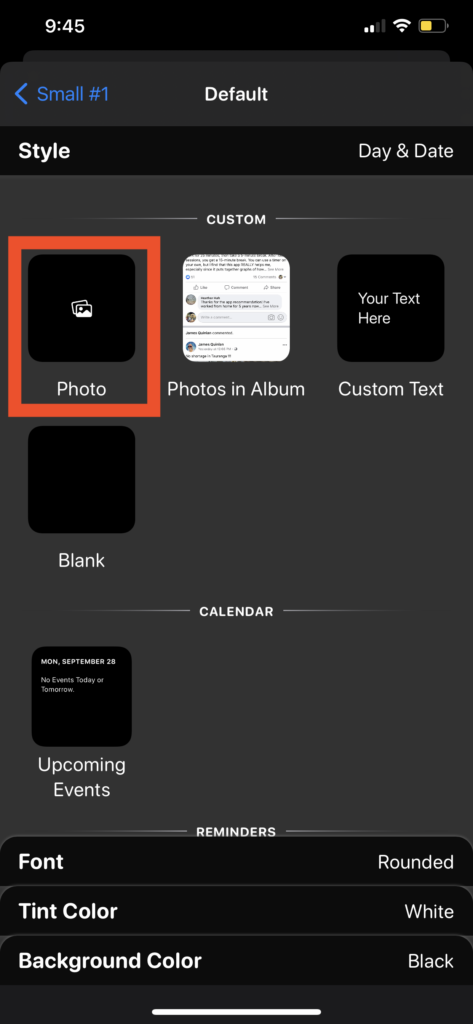
To create a photo widget, you should stay on the Style tab and scroll down until you reach the section that says “CUSTOM.”
Since we’re making a custom photo widget, we will click “Photo.”
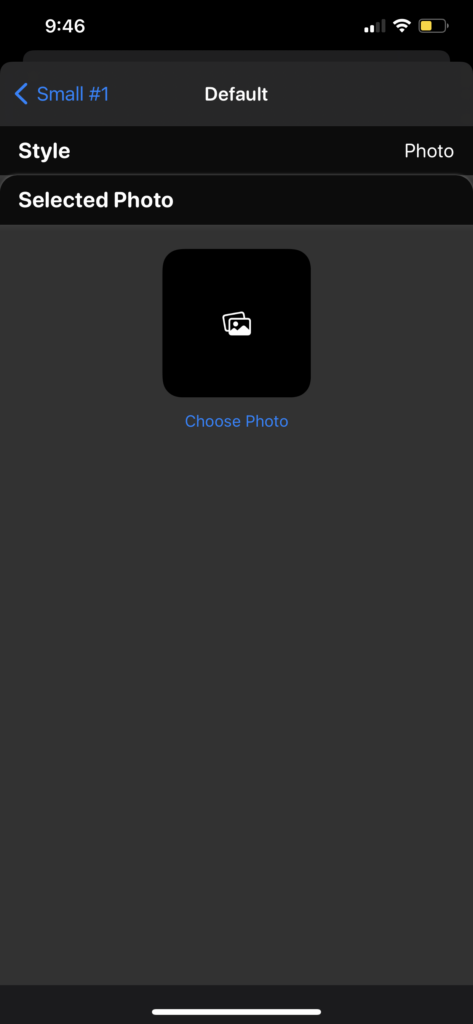
Once you click “Photo”, a new tab will pop up at the bottom that says “Selected Photo.” Tap that to reveal this screen:
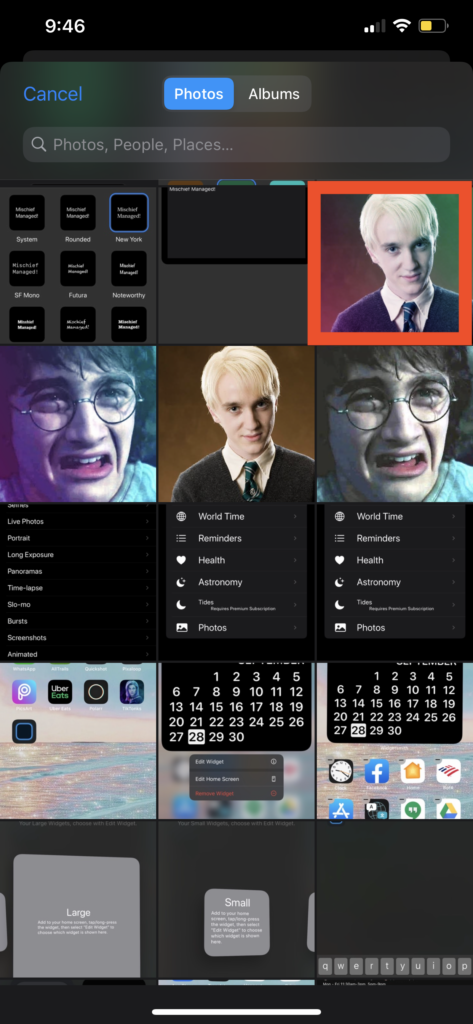
Now this is the fun part! Click “Choose Photo,” then go into your albums and choose the appropriate photo that you’ve colorized or saved, and click on it.
Your image should now appear as that widget.
Now, swipe down to save it. The main menu of Widgetsmith should now reveal your new widget. Feel free to name it something more memorable, so you remember which one is which!
The final step is to add the widgets you’ve created onto your home screen.
You can scroll to the bottom for that, but first, let’s learn…
How to Use Widgetsmith to Make Colourful Widgets that Match Your Aesthetic
Besides photo widgets, Widgetsmith comes with a lot of pre-built free widgets for things like the time, date, calendar, reminder, health, etc.
While these widgets aren’t as customizable as the photo widget we created above, they can still be customized to match the aesthetic you’ve created for your home screen. Here’s how!
Again, download Widgetsmith if you haven’t already, and open the app.
Once the app opens, you’ll be presented with a screen full of widgets that are divided into the following categories: small widgets, medium widgets, and large widgets.
You’ll see that there are calendars by default, but there are lots of different options for widgets (as you’ll see later).
Go to the size widget you want to add a photo or text to and hit “Add ___ Widget.” We’re starting with the “Small” widget, so we will press “Add Small Widget.”
A new widget will then be added to that size category.
To edit this widget, click ON the widget itself (for example, we click on Small #1) and you’ll then see this next screen.
From here, you need to Click ON the widget again, and your screen will show all the different widget styles at your disposal, from Time, Date, Custom, Calendar, Reminders, Health & Activity, Astronomy, and premium options if you pay extra like Weather and Tides.
Click on the widget you want to customize. For this tutorial, we will be using the “Day & Date” widget.
Once you click on that, the bottom few tabs will change to show all the customization options.
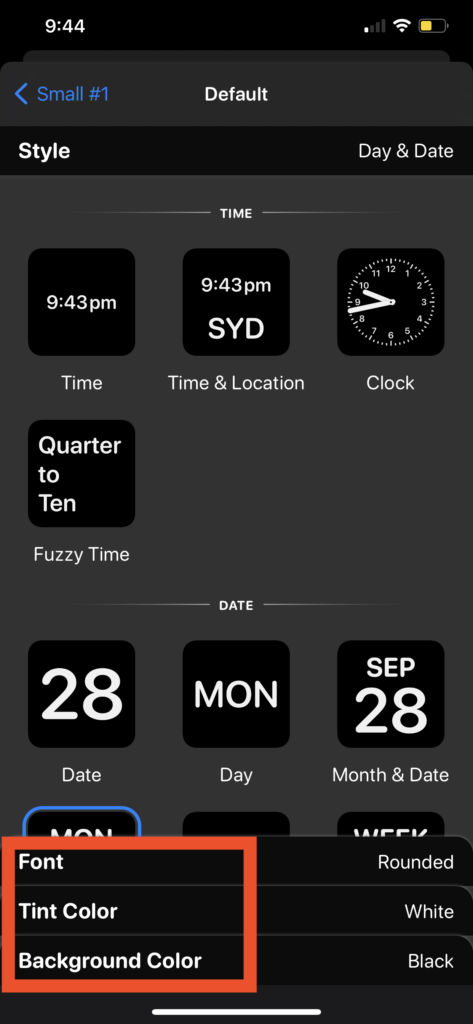
Flip through the different tabs to change things like the font, tint color and background color.
Go wild! This is your time to pick the best colors to suit the aesthetic you’ve chosen.
When you’re done, swipe down from the top to go back to the main Widgetsmith menu, and you’ll see the new widget you’ve created!

How to Add Your Widgetsmith Widgets to Your Home Screen
Alright, we’ve reached the final step!
After you have created the widgets you want to add, these are the steps you need to follow.
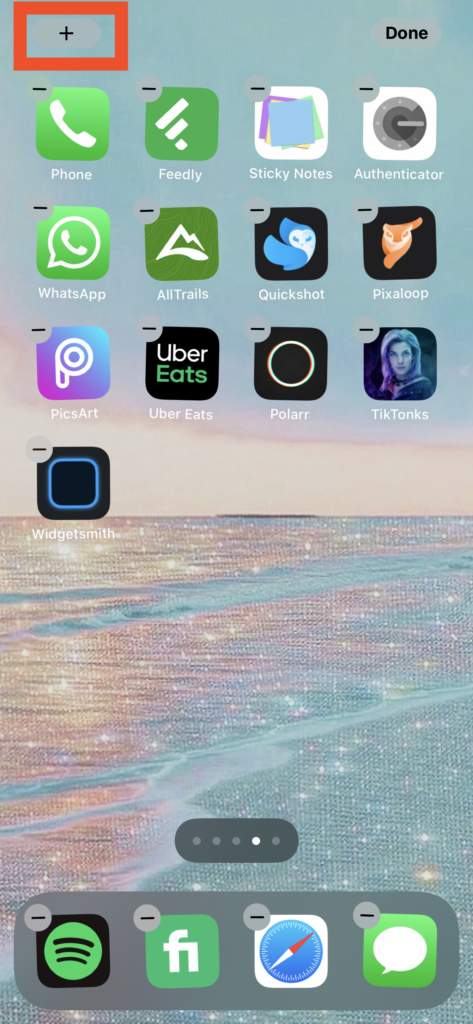
Head to your home screen and hold down your finger on any free space of the screen until the apps wiggle.
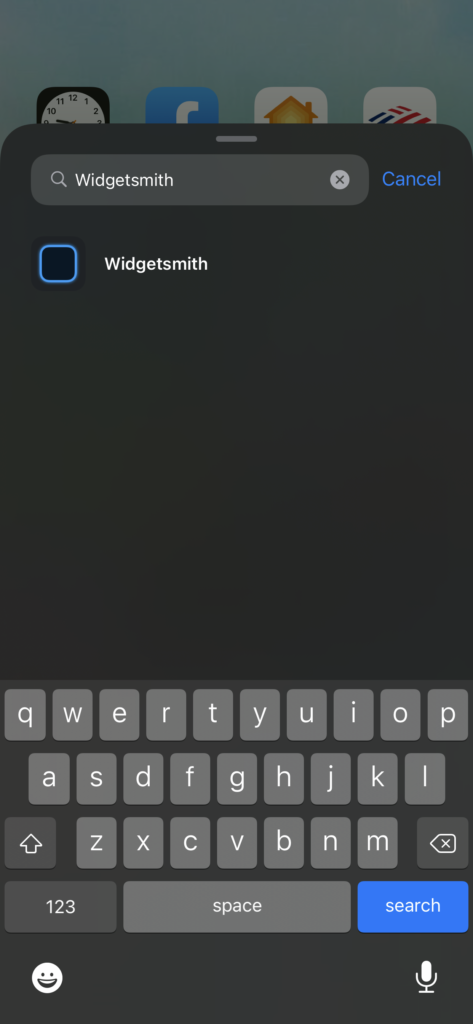
Click the (+) in the upper left part of your screen.
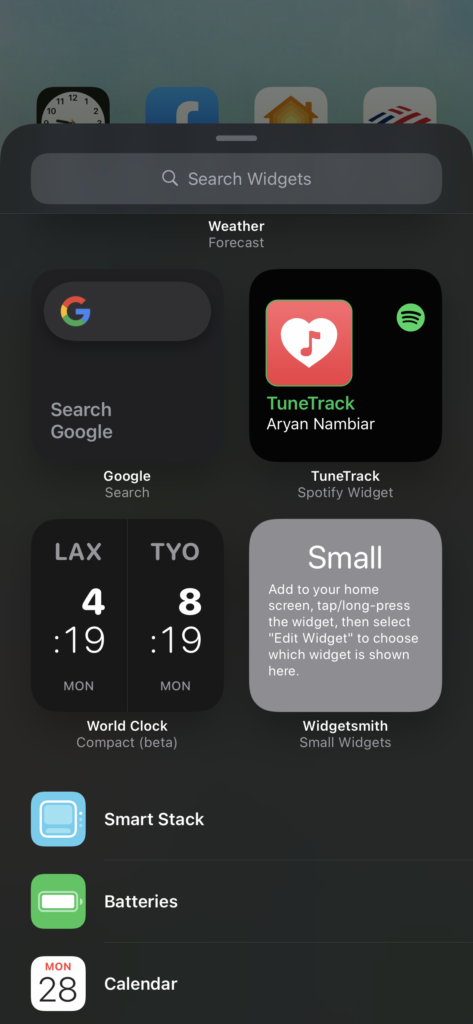
Search “Widgetsmith” in your widgets, click on it, and then “Add widget” (whichever size you wanted). Click “Done” in the upper right corner when finished.
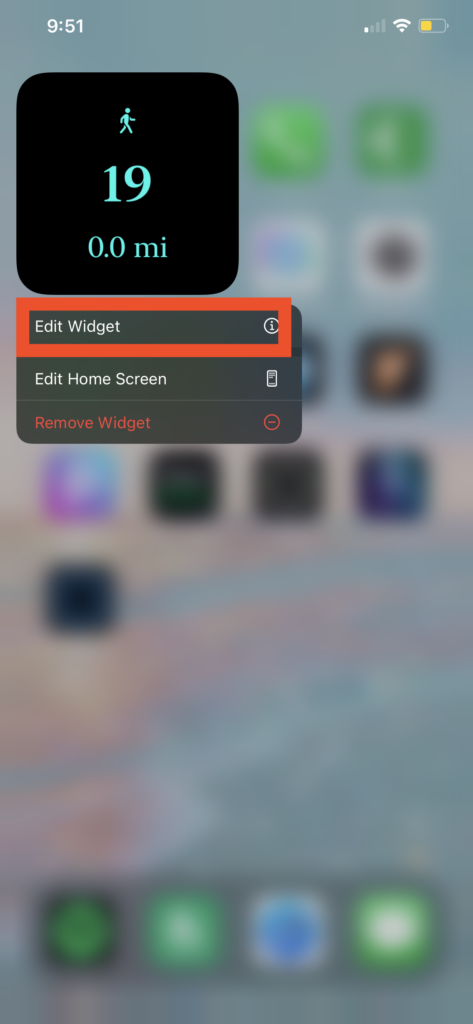
Chances are (if you have multiple widgets), the default one that is added may not be be the one you want to add. Don’t worry!
To change it to the one you want, press “Done” in the upper right hand corner to stop the icons from wiggling, then long-press the widget. From here, click “Edit widget.”
This will bring up a menu. If you click on the bar there that says “Widget”, it will open up a screen that shows a list of all your widgets belonging to that size.
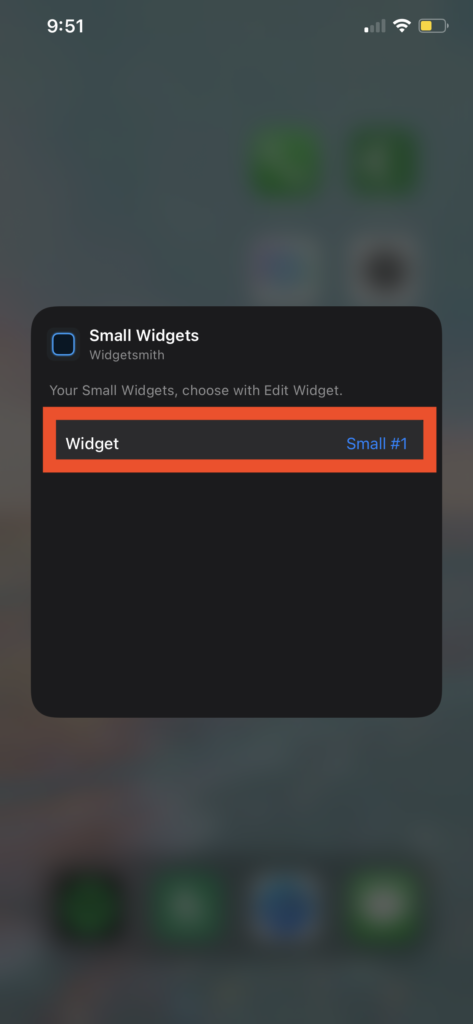
Select the Widget you want to add (again, this is why naming them memorable names is helpful).
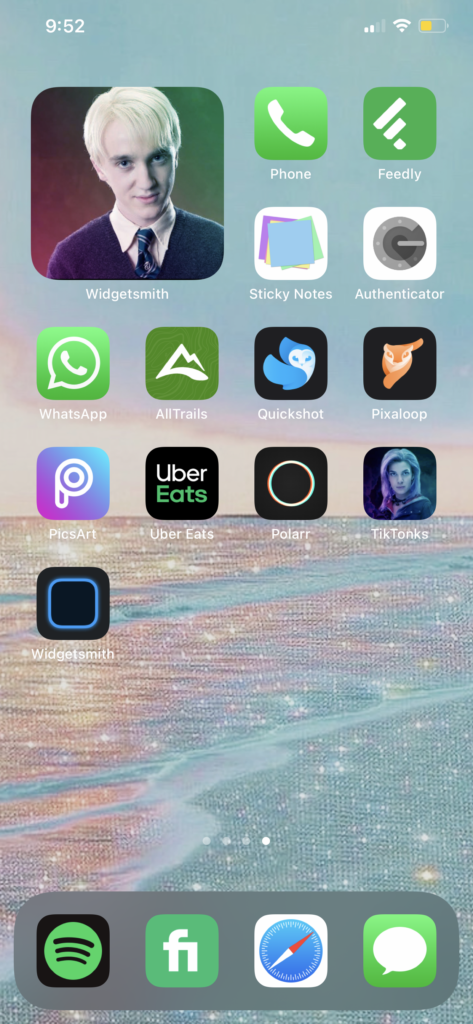
Then, you’re done! Swipe out of the Widgetsmith menu and the widget you’ve just chosen should now be in its new home.
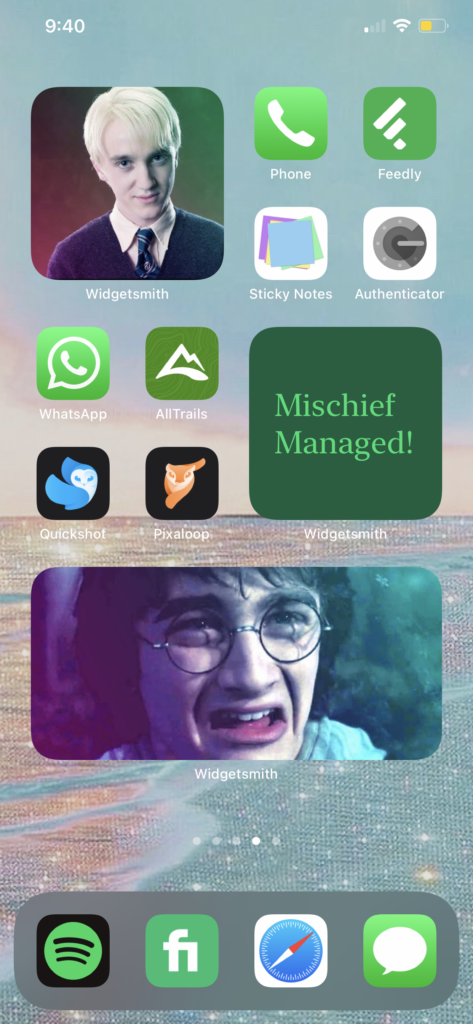
In our case, our home screen now looks like this, with Draco sulking at us!
You can add various-sized widgets (small, medium, large), even with custom text as well.
We’re not nearly as “aesthetic AF” as others, but here’s a sample of what you can do:
We Hope this Step by Step Widgetsmith Guide was Helpful!
Have an amazing time curating the perfect aesthetic home screen of your dreams…
And if you’re still confused, you can watch this tutorial on Widgetsmith below: